Tuesday, October 12, 2010

Logitech v220 repair

Disclaimer: I am in no way connected with any hardware or software company. I have not been paid any compensation to write this blog post.

1. INTRODUCITON

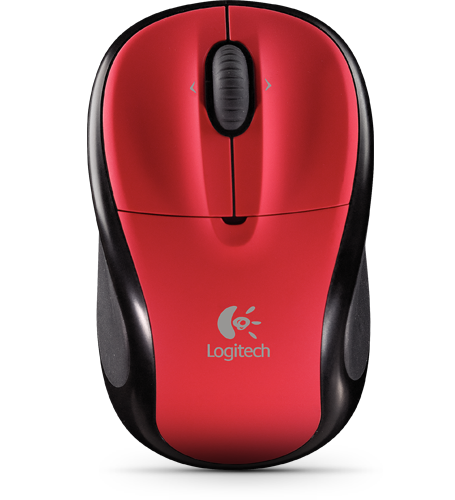
I've used logitech mice for a long time. They work and the most important attribute for me is their toughness. I can expect them to last at least 2 years under me and this makes up for their higher price. This particular logitech v220 cordless mouse is of around 2008 vintage. I use it for my laptop. Its not a gaming laptop so I have never used it for games much but I do not feel any lag. I chose it because it was the cheapest logitech wireless mouse at the time with AA. It uses a single AA battery and I prefer AA batteries because I try to standardize all my stuff to have AA batteries. That way, I have lots of spares and I can swap batteries among my gadgets.

This mouse has served me well and as is common with most mice, the left mouse button is the most used part and it tends to die first. In this case the problem is the left button sometimes double clicks when I give it a single click. It started a few months ago and it is getting worse so I decided to try to repair it. To be on the safe side I already checked out my local mall and I know the prices of the major models and brands of wireless mice. Since I always want to save money and I have a little free time and talent, lets expend time and talent instead of expending or spending money.

Essentially what is wrong with my mouse is a malfunctioning left microswitch or clicker. Here's a picture.


You have to replace the defective left clicker since I doubt actually fixing it is within my skillset. You can buy one, you can cannibalize one from another mouse which happens to use a similar sized clicker. Or you can merely swap the left and right clickers, which is what I decided to do.


2. DISSASEMBLING THE LOGITECH V220

The first thing you need to do is to open up the battery cover. To do that you press the big button on the bottom marked with the battery symbol. I've encircled it in red in the picture below. Press that with your fingertip and the cover pops open.


Take out the battery. You can see a screw (screwhole encircled with red) but you do not need to remove it.


Now you need to unscrew the casing. But where are the screws? Well, as is common with most manufacturers, they are hidden. In this case under the mouse feet. All 4 of the feet have to be pried open at least partially. I just used a fingernail.


Next, detach the power cable. There are 2 catches that lock the connector. Depress them with a paperclip or other tool then yank it off.


Next step is to unscrew the circuit board from the bottom half of the case. There are 2 screws, one also attaches the scroll wheel.


Now you have the bare circuit board in your hands.


Turn it over and look for the 3 soldered contacts below each clicker.


You need to unsolder all 3 contact points simultaneously. Prepare for it by first removing the antenna. Its the big shiny steel wire that wraps around the circuit board.You need to remove the antenna as it is in the way.


Next de solder the contacts. If you dont have the proper equipment you can just use a length of braided copper wire. Prepare the wire by soaking it in solder flux or rosin so it will "wet" with molten lead better. Heat the wire and let it melt the solder at the contacts. Capillary action will draw the solder onto the wire. As the wire fills up with solder just cut off the tip.

Once you have cleaned up the extra solder, apply heat to all 3 contacts simultaneously by using the side of your soldering iron or gun while at the same time apply tension or pull on the clicker. I just grab the clicker with my fingertips and push the circuit board with my knuckles. The clicker should fall off. Before you remove the clickers, I suggest you mark the left and right clickers so you don't mix them up.


The hard part is over. Merely switch the clickers and solder them into place. Make sure that the bottoms of the clickers are almost flush against the circuit board. Resolder the antenna. Screw the circuit board back to the bottom half of the case and make sure the on/off switch at the bottom of the mouse is working. Re-attach the power cable and insert a battery to confirm that the mouse is working. You should see the green power LED light up on the circuit board.

Next, replace the upper half of the case but before re-screwing the 4 screws under the feet, press the case together and test all the mouse buttons on your PC. Once you know it is working, replace the 4 screws and press back the mouse feet. There should be some contact cement left so the feet should stick but you can apply glue if you want. There you have it, a resurrected logitech v220 mouse.

The end.

Wednesday, October 6, 2010

Left 4 dead 1 and 2 STEAM sale


Left 4 Dead and Left 4 Dead 2 are on sale on steam

$6.79 each or $10.19 USD for both.

LINK.


The end

Tuesday, September 28, 2010

one DNS is OK, doubling it is not ok

I have PLDT DSL plan 999. When I first got it, I had difficulty browsing. Its most prominent when I go to a website I havent been to before, like links from a google search. To actually load the website you have to refresh the page a couple of times. If the page has linked pictures from another site like imageshack or photobucket, the images also have trouble appearing. The solution is to use google DNS. IF you dont know what a DNS is, read this.

Right now I got a new Belkin router, a Belkin F6D4230-4.

 In the router configuration page, there is a DNS section. You can input the google public DNS there. However the previous problems resurfaced. I think I licked the problem by resetting the DNS on my PC back to "obtain DNS server automatically", using google DNS only on my router.

I'm still testing it but it looks ok so far.


The end

Monday, September 27, 2010

Synthetic tests like these can be inaccurate sometimes

Try different servers in different cities. Then try again in 5 min. Sometimes you'll get wildly different results

in reference to: Speedtest.net - The Global Broadband Speed Test (view on Google Sidewiki)

Tuesday, September 21, 2010

Camelion FL3L2AA


The Camelion FL3L2AA. Here's a shot of the back of the packaging.


I found this in Marquee mall, Angeles city, Pampanga. Specifically the department store. Cost is PhP 79.00. At this price point I do not expect it to compete with the more powerful flashlights like the maglite.


Build quality is fair. Yellow plastic for the body. the switch is on the side, a sliding switch. The design of the switch and the body looks like this was based on an older model conventional flashlight and the bulb and reflector assembly was replaced by a LED one. Being a sliding switch, there is a hole in the side of the body. Hence this is not a waterproof flashlight.

It uses 2xAA batteries. One quibble is that the upper AA battery can wiggle around a little when you screw on the cap. So the positive end might not make contact with the positive end of the emitter.

The butt end is not completely flat so you cannot stand the light on it. It does have a swing out ring which you can use to hang the flashlight. The ring's hinge again makes a hole in the flashlight body so its not waterproof.


The 3 leds each come with their own reflector so the beam throw is kind of decent. Of course its less than a higher quality light like a maglite. Light intensity is rougly equal to the maglite's low mode.


Pictures of the beam with the camelion on the left, compared to the beam of a maglite on high on the right. You can also note the slightly bluish tinge compared to the maglite's warmer white.


For the price this makes an excellent flashlight for use inside the house. Dont expect it to last long if physically abused or exposed to water though. And dont expect very very long light throw.

I give this 4/5 stars, considering that its really cheap.


Link to official site with specs
link1
link2

The end.

Monday, September 20, 2010

cheap 5x8 paper

SM supermarket sells cheap 4x8 paper. No lines (unruled). Bound with padding glue.

PhP 36 for ~ 500 sheets.

This may be of use if you want to print stuff this size like reciepts, prescription pads, etc but dont want to pay for professional printers. With refilled inkjet printers, it  might be much cheaper specially if the print run is small.

panther surge protector fix

This panther surge protector broke my router. Sa a background, read about my broken router here.

Now Here are pics of the surge protector. I've been using this for almost a year before it exhibited any symptoms.


This is the socket that has a problem.


Those sockets are designed for tool free assembly. They are designed to use solid wire instead of stranded copper wire. To assemble it all you need is to insert the solid wire into the hole and the spring loaded contact will grab onto it. Other designs have screws and you wrap the wire around the screw then tighten the screw.

Now lets look at the hole.

The left one is the hole in question while the right one is a normal hole. Unlike the normal gibbous moon shape, the broken one is a ragged crescent moon shape. So the tip of the contact is broken. This means the wire is free to wiggle around in the hole. This is what caused my problem. Unplug a plug from other sockets and this causes stress which pulls the contact away from the solid wire, causing a spark. The fix is simple


Move the wire from the broken hole (red arrow) to another working hole (blue arrow)

projectwonderful adszz

Nuffnag Adzz

Slashdot It

Followers